Student Payment Instructions
Student Payment Portal Pay Now
See instructions below on how to use the Student Payment Portal:
In the fee payment suite you will be able to:
- Check your balance
- Make a payment towards your balance
- View your online payment history
- Store your payment methods for quick and easy future payments
- Sign up for eRefunds to obtain your refunds via ACH
- As a student, provide permission to others (parents, employers, etc) to view your bill and make payments
This is an Easy, Secure, Convenient, and Fast way to pay your bills.
Easy - Gain immediate access to your current account balance and detail. You are only a couple clicks away from viewing your bill and making a payment. And it's easy to give your parents access too.
Secure - Pay online using an electronic check (no fee) or credit card (fee applies) knowing your information is secured using industry standard protection.
Convenient - Want to make a payment during a study break at the library? No problem. Access your student bill through a web browser anywhere, anytime.
Fast - Scrambling to meet payment deadlines is a thing of the past. Payments made through our payment system will update your student account in real-time and provide confirmation via email.
If you have any questions, please contact us at:
Phone: 404-894-4618
E-mail: bursar.ask@business.gatech.edu
Student Payment Instructions
- Students Login Page
Login with your GT account username and password - The Home Page
Home Page includes an account summary - Payments Tab: Make a Payment
Make a Payment with webcheck or a credit card - Using Payment History Reports
Payment History shows recent payments made online - Viewing Account Activity
- Deposits
Deposits let you pay Acceptance deposits and Housing prepayments - The Authorized Users Tab
Student Login Page
Students may access their student account information by clicking the Student Pay link at the top of this page.
The Home Page
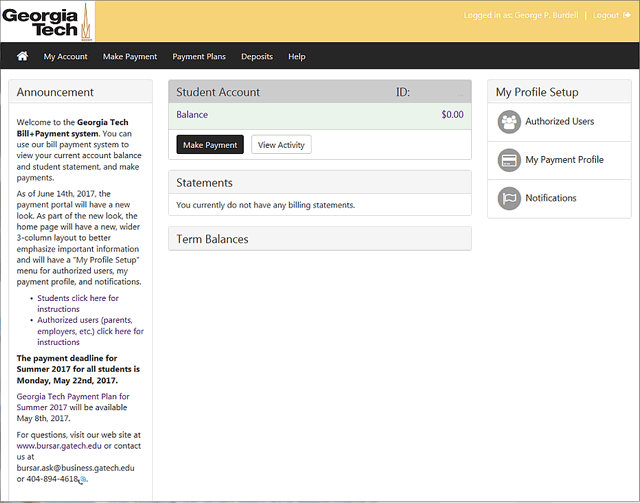
This is the place to manage your student account activity. Here you can view your bills, make payments, and set up authorized users (parents, employers, etc.). Use the tabs along the top to navigate through the site.
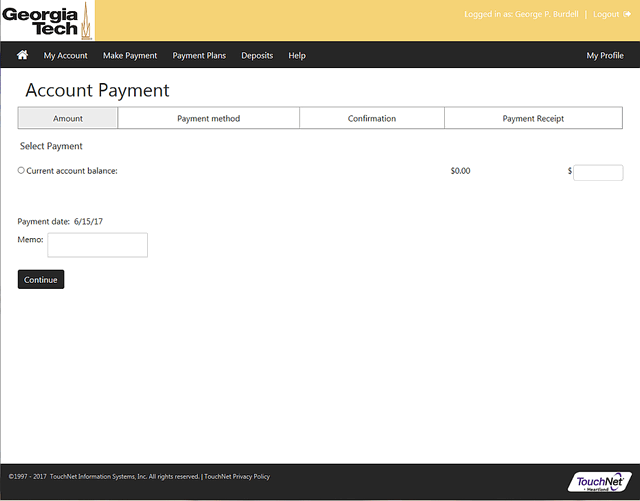
Payments Tab: Make a Payment
To make a payment, click the "Make a Payment" link. Select a payment method you have previously saved or a new payment method.
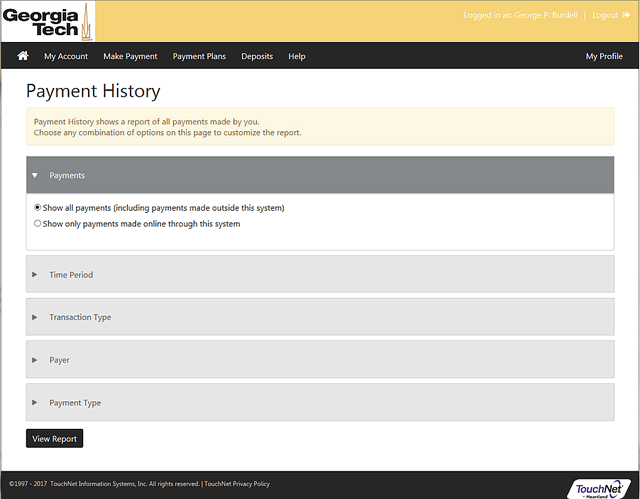
Using Payment History Reports
You may set any combination of filters to view payment reports. All filters are set on this screen; to reset the filters or set additional ones you must return to this screen.
You choose whether or not authorized users may see your payment history. If you don't allow it, then the authorized users will see only their own payment history.
If you allow an authorized user to see your payment history, then the authorized user will see his or her own payments and your payments, but not the payments of any other authorized users.
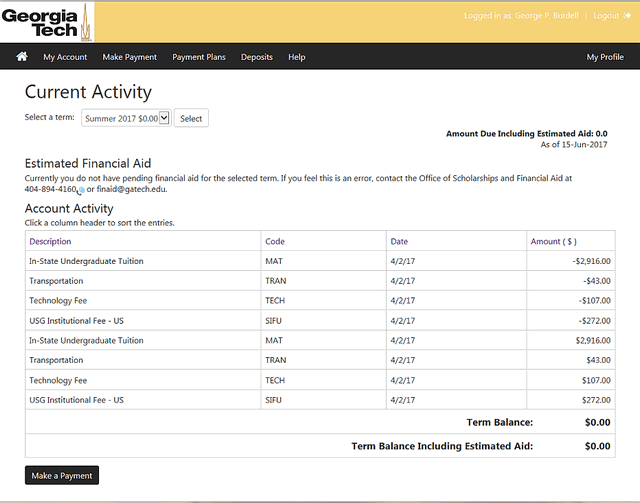
Home Tab: Viewing Account Activity By Term
The Account Activity page allows students and authorized users to view transactions by term. Students and authorized users may select a term to see detailed activity.
The Make a Payment button on this page will take you or your authorized user to the Payments Tab.
The Make a Payment button is not shown if you have a negative balance on the account for the selected term.
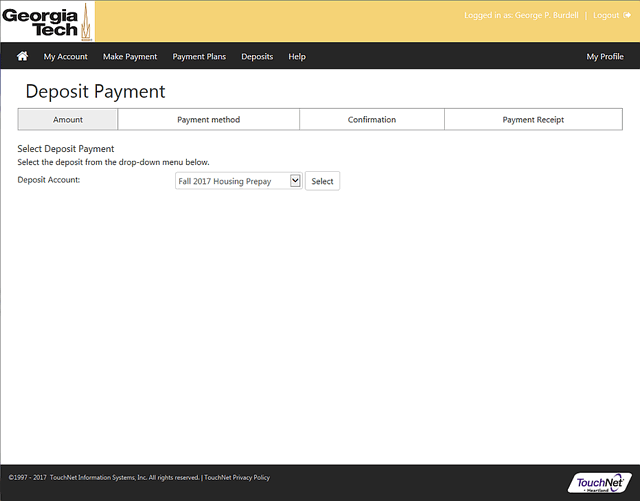
Deposits Tab: Make a Deposit
This is the page where you can make deposit payments such as Housing Deposits. Use the drop down arrow to select the deposit and click "Select".
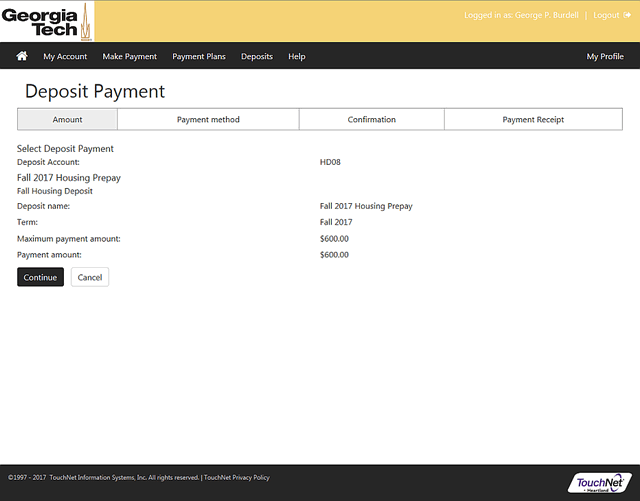
Next, click "Continue".
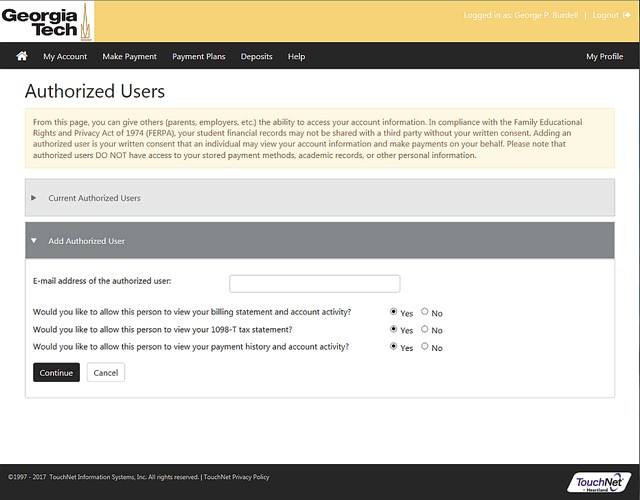
Authorized Users Tab: Access For Others to Your Account
From this page, you can give others (parents, employers, etc.) the ability to access your account information. In compliance with the Family Educational Rights and Privacy Act of 1974 (FERPA), your student financial records may not be shared with a third party without your written consent. Adding an authorized user is your written consent that an individual may view your account information and make payments on your behalf. Please note that authorized users DO NOT have access to your stored payment methods, academic records, or other personal information. To add an authorized user, enter their e-mail address, set viewing options and click "Continue". The authorized user will use their email address to log into Bill+Payment Suite.
